Okay, first of all... This tutorial was originally posted by one of the NS texture artists, so I don't really hold any "ownership" over this technique. If you have any questions, you should probably ask them.
However, I've decided to post it here so that more people could benefit from it's "greatness". I've merely clarified some of the steps and made pictures.
For this tutorial, you will need the vastly overpriced Adobe Photoshop (5.5 or higher)
1) Create a new 128x128 or 256x256 image. (probably 256x256 so you can shrink down to 128x128; it's usually better to work in a scale that's 2 times as big as the texture size you actually want to work with, then scale it down later.)
2) Find a dark colour that is nearly gray, but not quite. An example would be 80 80 86, which has a slight bit of blue in it. This is so the metal might be a little more interesting than your average "gray".
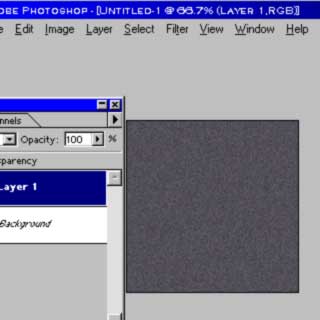
3) Fill a layer with this colour.
Use Filter -> Noise -> Add Noise, with a value of 10-20, set to Uniform and Monochromatic. (This is our base)
4) Create another layer on top and fill with the same colour.
Apply the same Noise filter also.
Use Filter -> Artistic -> Palette Knife, with a value of Stroke Size 32-48, Stroke Detail 3, and Softness of about 4-6.
Set this layer to Normal blending with an Opacity of 25-35%
(This adds a slightly galvanized look to our metal)
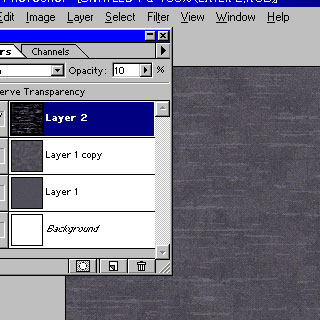
5) Create another layer on top and fill with the same colour.
Again repeat the same Noise filter.
Use Filter->Pixelate->Mezzotint, with a value of Long Strokes. Set this layer to Screen blending with an Opacity of 10% (This adds some nice horizontal scratches)
6) Create another layer exactly the same, except rotate it 90 degrees.
(This adds vertical scratches)
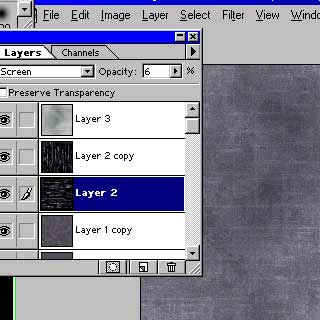
7) Create one last layer and give it a darker shade of the same colour.
Use Filter->Render->Clouds. Do this repeatedly until you find a nice mixture of shadows and highlights. Set the layer to Overlay blending and adjust the Opacity as you see fit.
(This adds the shine to the metal)
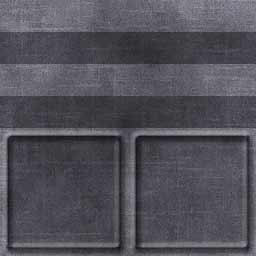
You should have something that looks like the metal texture shown below. Now that you have a good basic metal texture you can work with it as a base for more detailed textures. If you look at the Wall_Lab series in the ns.wad you'll see that Cory aka Squeal like a Pig used the same pinkish metal image for each texture in the series.
Yes, kind of an ugly example... But you get the idea.
Well, and that's the "NS metal tutorial". Happy texture making. Note that these the results of this tutorial are, well, somewhat ugly. Yeah, they don't really look like the NS textures because those guys did alot more... This is the base though of their textures. (or atleast that's what I've been led to believe).
Remember that you can use any part of this tutorial in any texture; you don't have to limit it to metal. For example, Mezzotint
does create some nice scratches, maybe for concrete as well as metal. The key to texture making is to experiment.