This tutorial will explain how to find and edit the lights.rad file that makes textures look like they are emitting light.
<OL TYPE=1>[*] First off if you don't have it installed already go to Windows Update and install Microsoft Net Framework. You also need GCFScape. You can get it
here
[*] Close your Steam. You can not open up .gcf files with Steam open.
[*] Open up GCFScape, click on
File,
Open and navigate to your SteamApps folder. Mine was located at
C:Program FilesSteamSteamApps
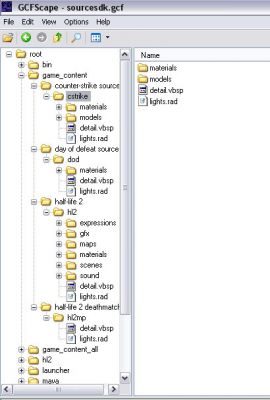
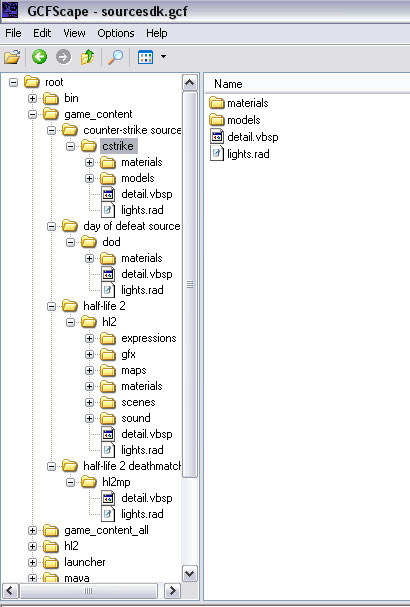
[*] Open sourcesdk.gcf
[*] Click on game_content and then the game that you are working on. I chose to extract the one that is in Counter-Strike Source - cstrike.
To extract lights.rad right click on the file and choose extract.
Extract it to the same directory as the MOD you are working on. In my case it was
C:Program FilesSteamSteamAppsme@myemail.comCounter-Strike Sourcecstrike
[*] Close GCFScape and navigate to where you just extraced your lights.rad.
[*] Open up lights.rad with notepad and look at the first line...
 lights/fluorescentcool001a 189 231 232 350
lights/fluorescentcool001a
lights/fluorescentcool001a 189 231 232 350
lights/fluorescentcool001a is the name of the texture,
189 231 232 is the RGB value, and
350 is the brightness.
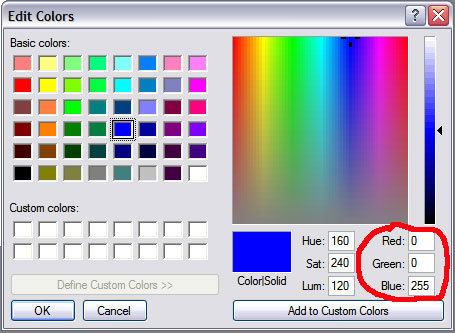
[*] To change the color of the light that the texture emits you want to change the first 3 sets of numbers to the RGB value of the color you want. The best way to find out the RGB (red green blue) value of the color you want is to fire up MS Paint, click on
Colors,
Edit Colors..., and then hit the
Define Custom Colors >> button.
Lets pick pure blue for example. Once you click your color look to the RGB values on the bottom right. the order of the numbers are top to bottom, left to right.
So, 0 0 255 equals pure
blue.
[*] The next step is brightness. To change how bright the texture glows or emits light set the last set of numbers, the higher the brighter- changing
350 to
500 would make it seem brighter.
<LI>After you are done changing your values be sure to save any changes.</OL>