Before you do this tut you should allready have fooled a little bit around with displacement surfaces so you know the basics; there are two here by Reno worth checking out.
In order to create our tunnel we will be looking at the following:
- Creating "displacement surfaces"
- Using "subdivide"
- Using "sew"
- Using the "power of" setting
- Using "noise"
- Using "paint geometry"
- Using "invert alpha"
- Using "paint alpha"
Stage 1 - Creating the base brushes for the displacement surfaces
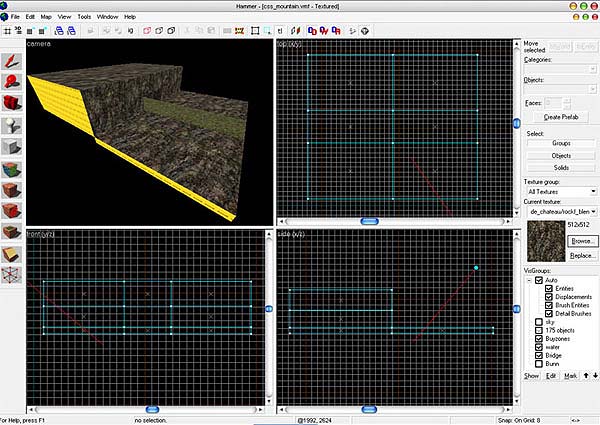
Start off by making 9 world brushes and place them like this:
Texture all brushes with "de_chateau/rockf_blend" except for the two brushes that make up our road - for those use "de_chateau/groundd_blend"
Note - You don't have to texture the sides that won't be seen with the "nodraw" texture, as they will be discarded when we create the displacement surfaces - I just use it to show which sides we will be using ...
Notice how the edges of the side cliff brushes are lined up with the top surface of the ground and road brushes:
Stage 2 - Creating the displacement surfaces
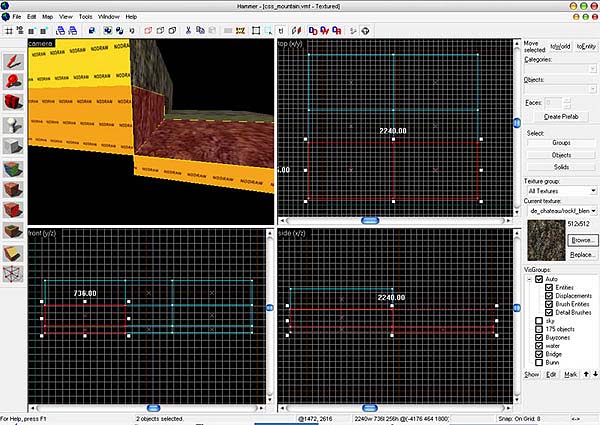
Now open up the "texture application tool" and select all the faces we will be using (15 faces total).
Don't forget the inside roof of the tunnel!!
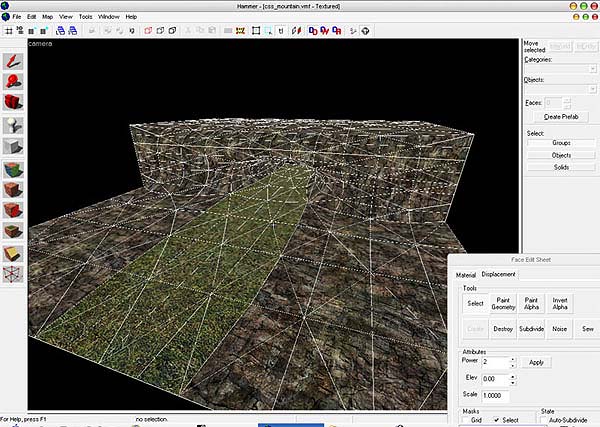
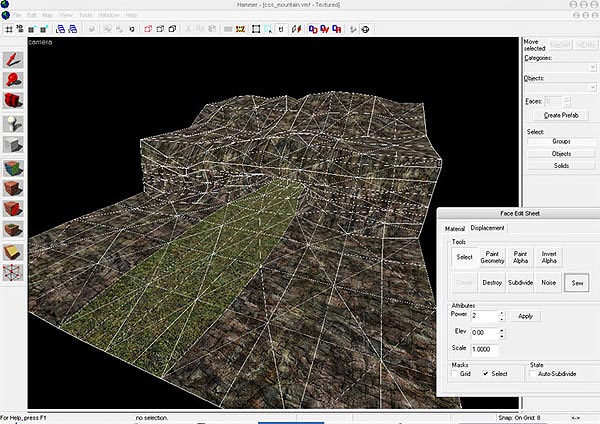
With all faces selected switch to the "displacement" tab in the "texture application tool" and then click the "create" button, and all the surfaces will be turned into displacements.
Notice how all the non-selected faces were discarded during this process:
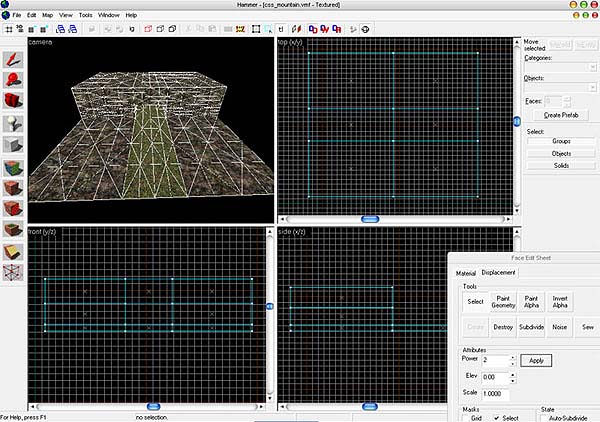
For the creation of the displacement surfaces I set "power of" to 2.
If you set it to 3 or 4, the surface will be made up of more triangles giving you greater detail. You can just use 2 for now.
You could now manually paint the terrain to get what you want but it's a lot quicker to use the various displacement tools, which we will do in the next stage ...
Stage 3 - Editing the displacement surfaces to create realistically looking terrain
With all the faces still selected click the "subdivide" button and notice how all the angles between the various surfaces are rounded off (both inside and outside angles):
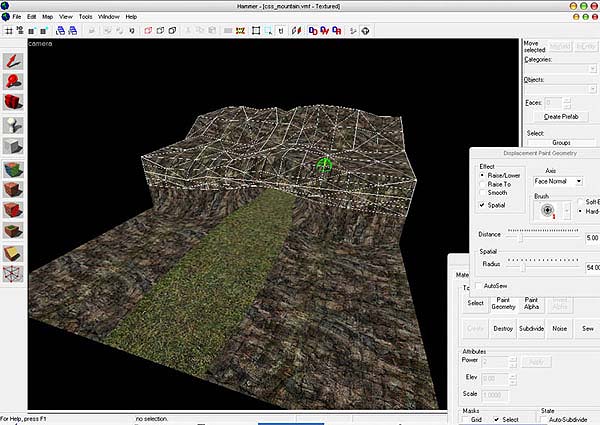
Now select the top 6 surfaces and click "paint geometry". Then manually raise the vertices at the back of the top surfaces to make a cliffside out of it like this:
Note - You should experiment with the various settings in the "displacement paint geometry" dialog to understand what they do - for now just use the same settings I did.
Now I want to make my terrain a little more bumpy - This could be done manually, but it's quicker to just add some "noise".
Select the cliff side and ground surfaces (we don't want to bump up the road so don't select those two surfaces). Then click the "noise" button and enter values of 20 min and 30 max and click "OK":
The terrain now got a little more bumpy - The effect would have been greater had we used a "power of" value of 3 or 4 when we created the displacement surfaces.
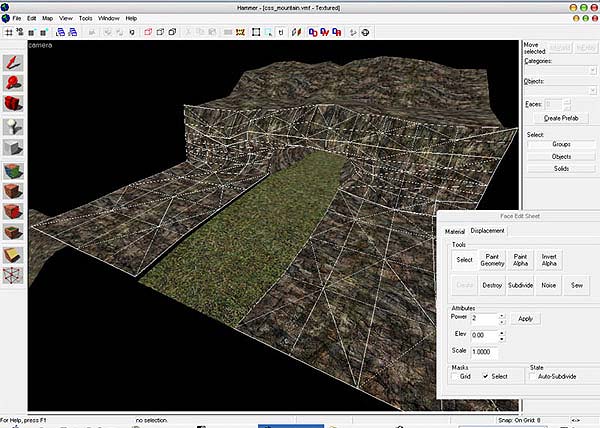
Notice how doing this this made holes in the seams between our various surfaces:
In order to rectify this - select all surfaces again and click the "sew" button and all the holes in the seams will be closed back up:
Stage 4 - Painting the surfaces
Now, even though our terrain is beginning to look nice enough - the texturing makes it look unrealistic. We are going to adress this now.
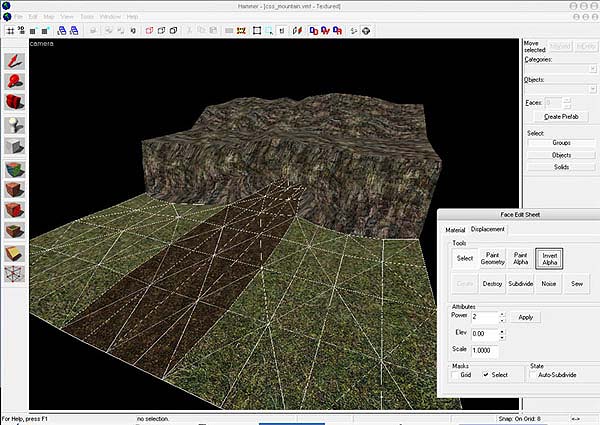
First off, select the road and ground surfaces then click the "invert alpha" button. This switches the texture to the other part of the blend texture. So now the ground looks like grass and the road looks like dirt:
Then finally select all the surfaces and click the "paint alpha" button. Now you can use the left and right mouse buttons to paint the textures so that you create nice blends in the transitions between the surfaces. Make sure that you have the settings in the "displacement paint alpha" window set to something like this:
Effect: Raise/Lower
Brush: 1
Value: 22
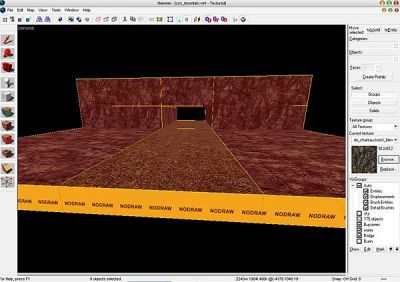
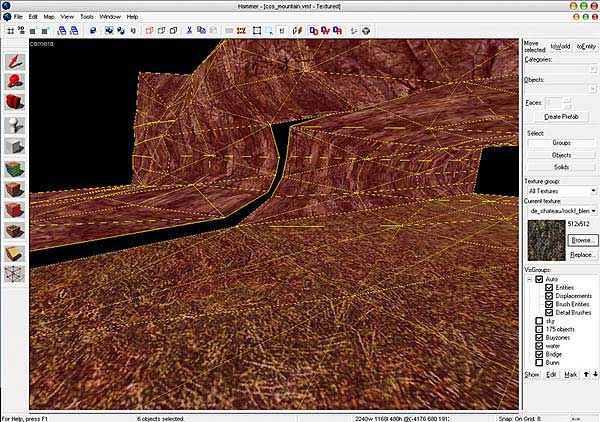
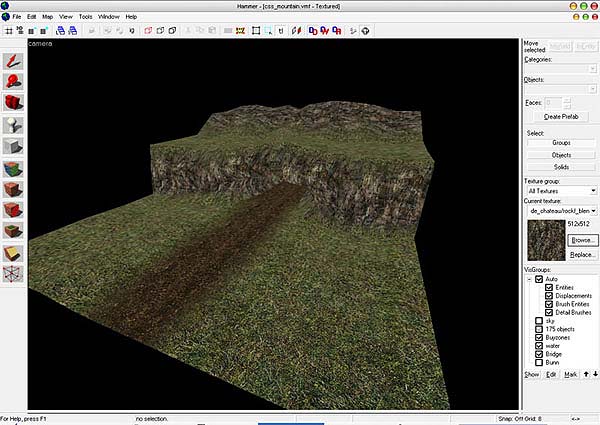
After having painted the surfaces you should end up with something like this:
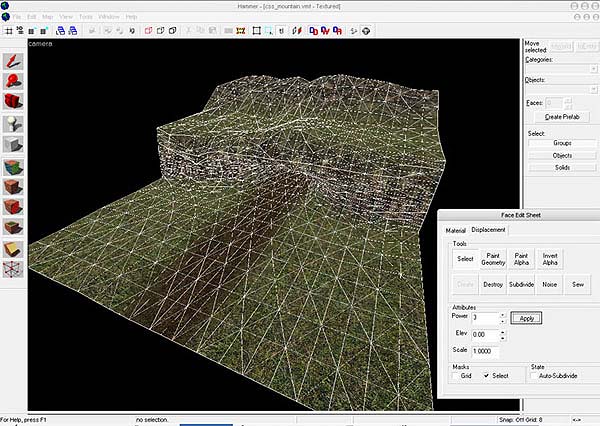
Now you are pretty much done. You could allways put more work into making the terrain and texture blending look even better than this. By selecting all faces and setting the "power of" setting to 3 you will get a lot more triangles/vertices to work with, which gives you more control both when making the terrain itself as well as blending the textures. This is however more expensive in terms of performance:
When that is said - displacement surfaces are pretty cheap for the engine to render so you can get away with quite detailed terrain if you don't go overboard with other stuff like complicated world brushes, phsyics, models, water etc ...
There is one thing however, that you need to be aware of. Displacement surfaces do NOT block VIS! So in order to rectify this, you should place ordinary world brushes textured with "nodraw" underneath all of your displacement surfaces.