Intro
Introduction
In September 2008, Sjoerd "Hourcenes" De Jong (
http://www.hourences.com) released a survey he conducted across the level design community. In that survey one statistic revealed was concerns over gameplay in multiplayer levels (for any 3D shooter game). In it, Hourences found that tied along side "bad performance" "getting stuck on geometry" was
the number one most frustrating thing to be endured in a multiplayer level (
source).
So with that in mind, I'd like to take this opportunity to show you budding or perhaps already experienced level designers some intuitive and even some
un-intuitive tricks of the Source engine and Hammer to help players navigate your maps much more smoothly and to help you be much more conscientiously aware designers.
Outline
- Prop_physics and their features
- The ultimate tool: player clips
- General layout techniques
- Conclusion
>Move on to the next page to get started!
Physics Props
What is A Prop_Physics?
For multiplayer levels in the Source Engine, one expects a lesser degree of physics interaction than with the single-player counterpart. For the most part you'd be right, but Valve and the team behind Half-Life 2 Death Match put a bit of extra effort into the network code enabling proper physics models to perform adequately in an online environment (contrary to popular beliefs about Valve making HL2DM as an afterthought project). So with that, you may be already familiar with the entity:
prop_physics. This is the primary entity used to render single physics-based models in-game. That is, any model needing to be kicked or picked up or interacted with the environment of the game should be placed into the level via this entity.
Now, this entity is great for single-player games, and I wouldn't use any other, but for multiplayer games, this entity may not always be the right choice, but we shouldn't eliminate it from our dictionary of multiplayer entities just yet!
Benefits of Prop_Physics_Multiplayer
prop_physics_multiplayer is pretty much identical to
prop_physics in just about every way except for the most important way in the eyes of a server. Models existing as
prop_physics_multiplayer have a much more 'bouncy' and less accurate method of collision detection (taken from article at
EditLife). This is so the server takes less stress when attempting to calculate EVERY player's collision interaction with a physics prop on the fly and can focus its saved processing power for other things. The 'bounciness' is due in part to the automatic collision detection applying a generic 'bounce' force against the player and other possible collision surfaces instead of calculating the rigid collision mesh that would otherwise be used to calculate how a model sits on a surface. It's because of this type of automated collision detection that you would
not want to use this entity on objects intended to be picked up by the player and used to slam another player in the face with, because it may not detect their face at all! -It's too cheap.
Now, when attempting to place down some eye-candy models in your mutiplayer level, you'll want to consider their size and purpose. If their size is really big, then it should be an automatic inclination of you as a mapper to make these a
prop_physics because they are more likely than not to be encountered by and perhaps even used by players as part of the game environment (especially in HL2DM). Now, if their size is small and most likely won't have the intended use of being thrown at a player or stepped on, then it might be in the best interest of the mapper to go ahead and turn these kind of entities into a
prop_physics_multiplayer. Now of course purpose is not always correlated to size, so understanding what the
prop_physics_multiplayer entity does, it is up to you, the mapper, to decide whether an entity deserves to be rigidly calculated or just simulated.
It ought to be noted about making a few other checks before keeping this entity in your multiplayer maps. be sure to check under the 'Flags' tab of this entity: "Debris - Don't collide with the player or other debris." This is important for entities you
do not want to collide with the player. Simply placing them as
prop_physics_multiplayer will not keep them from getting in the way of a player. Similarly, you may check "Prevent pickup" to prevent further player interaction, but usually the 'debris' flag will cover this. Also of note is the "Force server-side (Multiplayer only)" flag; only check this if it is important that this
prop_physics OR
prop_physics_multiplayer entity is needed to be synced at the same time for all players. (like a large boulder barreling down a mountain to kill several players at once). Anything made 'server-side only' will only cause more lag across all players connected to that server. Generally it's a good idea to avoid this flag. It's also important to note that you should use either 'physics' entity sparingly; they are both resource hogs somewhat compared to other entities.
Possible Suggestions:
Set to
prop_physics_multiplayer if:
- garbage debris only meant to collide with other debris
- environmental effects to be 'pushed' (physical leaves, dead fish, small bricks)
- tied physical entities (bag on a punching bag stand, dangling ornaments, swinging lights)
- distant unreachable objects meant to move physically
- falling models that are numerous (concrete chunks from a ceiling, apples from a tree, books off the shelf)
Set to
prop_physics if:
- large objects expected to come in contact with the player
- deadly objects by mass (falling boulder, guillotine)
- need accurate collision detection (round ball in a square hole)
Prop_Physics_Respawnable
One last note:
prop_physics_respawnable are another entity used commonly in multiplayer maps. Their physics calculation is exactly the same as the expensive
prop_physics entity (because it is assumed this entity will be used to smash other players in the face). The only difference is their "respawn time" keyvalue. It only applies if the entity can 'break,' otherwise it is useless for those entities that can't explode or break apart. The default time is usually 60 seconds. Make it longer if it is a 'game-changer' or really popular throwable prop; this would make it more rare and special. Okay, I think that's enough about physics entities
 >Next up, the ultimate tool, Player Clips!
Player Clips
>Next up, the ultimate tool, Player Clips!
Player Clips
Why Should I Care About Player Clips?
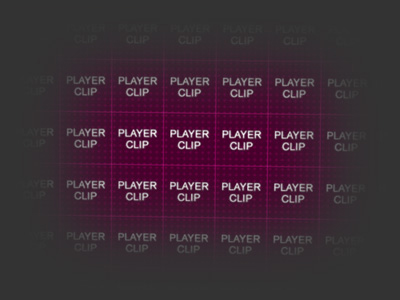
Player clips are hands-down
the best way to keep your player in check. All it is is an invisible wall that only affects the player and nothing else! You can shoot through it, you can throw stuff though it, even NPCs can walk through it, but not the player; nope, the player is the one thing this texture tool does not like and absolutely refuses to be nice to. The beauty of player clips is that they need not be used as invisible walls at all. They have a myriad of uses, if you are willing to get a little creative.
A Few Things You Should Know About the Source Engine
In Source (specifically HL2 and related versions), the player is represented as a 32x36x72 (inch) 'block'. (1 unit in Hammer = 1 inch) (
Source). As such, regardless of which direction you are facing, you're likely to get 'trapped' or 'caught-up' by some geometry (a.k.a. any shape with a collision hull) as you move through a level. Since game engines like Source are meant to be dynamic, there are no stipulations about which surface is the 'floor'. The floor could be one face of a brush, or the top of a pile of dead body models, or a moving brush. Any way you look at it, the floor is whatever surface you happen to be standing on. Because of this freedom of definition, Source relies on its robust Havok physics simulation system to calculate how you should be standing on each of these varied surfaces. The same is true for walls and ceilings. There are no Source definitions to indicate to the player model that "hey, this is a wall, make sure I act this way when approaching it!" No, it's simply a surface that is vertical. It's easy for the player 'block' to move around on smooth non-moving surfaces, and 'glide' against a smooth flat vertical surface, but what happens when it encounters some non-flat floors and non-flat walls? There are some tips to be had here!
How Can I Help the Player?
Best way to show you is by presenting some examples. Let's look below:
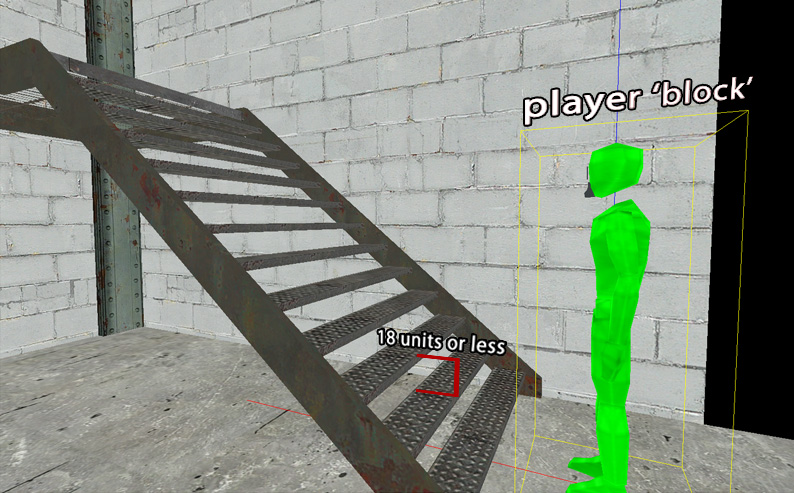
Here above, you can see the physical player 'block' as represented in Hammer. When players in Source encounter a vertical edge that is 18 units or less, the engine will automatically step them up to the top of the edge. So, when constructing stairs be sure to stay true to this dimension as it serves not only a visual aspect, but functional as well. Well, as a player continues up a flight of steps, the steps will undoubtedly be jarring the players view as the engine automatically steps-up the player each time they encounter the next step. This isn't such a big deal, in terms of level-design, but can be 'smoothed-over' with the use of player clips. What's more important is that a player who tries to jump up some steps while moving across them, will find themselves halted in their progress because there was a vertical step they didn't reach and the engine must first 'land' them when they reach the next flat surface so that they do not bounce. And the last reason, why we should fix this, is because in HL2 and related games, the player has a speed boost mechanism that allows them to move more quickly along a surface. Sprinting down a flight of steps will send the player flying rather than hurriedly stepping his way down the flight.
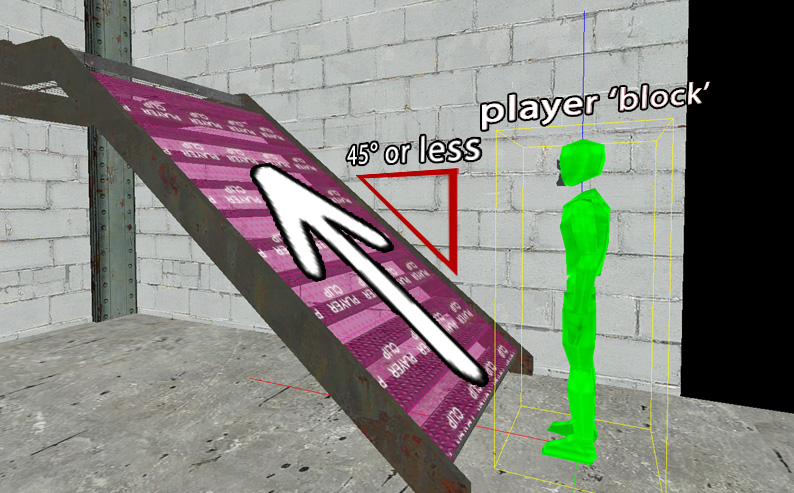
The fix is quite easy.
As you can see above, by coating a brush in the player clip texture, it allows the player block to 'glide' up along an invisible ramp without all the jarring sensations from stepped brushes. And It eliminates a player from flying off the flight, if they decided to 'sprint' down the steps. Moving on...
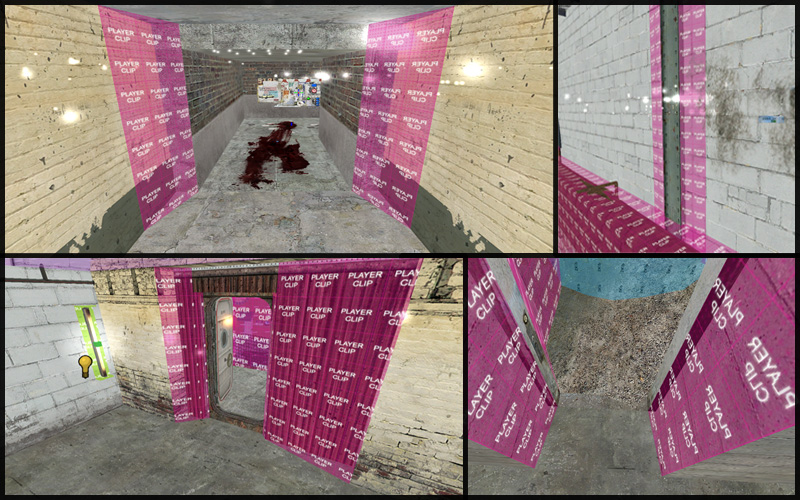
Below you can see an easy fix for short objects and doors in the way of travel. By creating simple ramps turned on their sides coated by the player clip texture, you have a nice easy, flat, & most importantly: Invisible surface for the player 'block' to glide along. Here are some examples below:
Using this method anywhere you feel a player might get hung up at, or be moving really fast through, will only help you to be a better mapper. I don't think there is a situation where doing this will cause bad reviews to come about. This is one of those methods that the professionals use, but never tell you about :hee:. As a level designer, it is your duty to the player never to allow them to get lost or 'hung-up' in your world. If they never notice they're playing a game, then you've done your job right.
>Now for some layout techniques!
Layout Techniques
Straight Hallways Are Best, "K, got it, then what?"
Whoa, hold on there! That's not all there is buddy. Sure, you're right; straight corridors or open spaces do make it easy for a player to run around freely, but come on, that's just plain BORING!
Here are some neat things you could do to make those spaces more exciting and indeed interesting.
Curves
Curves you say? Yes, curves. The Source engine may not like them, but there are ways to make them spot-on using brush-work and not give the engine undue stress. The way to go constructing them is beyond the scope of this tutorial. For those references, you can check out some of the other great tutorials and articles right here on SnarkPit. See the following:
Now, using curves to design and layout your level, you have the opportunity not only to have continuous flowing smooth surfaces to allow your player 'blocks' to move along, but also gives interest to the perimeter of the space. If you'd like to play for yourself some interesting maps that utilize curves (A LOT of them), then I suggest you try any of the HL2DM maps made by one SnarkPit member:
Juim. He not only uses curves, but he puts them in spirals and spheres as well.
Open Z-axis
In level design, we call anything that goes up, the Z-axis. This nomenclature of course comes from the x-y Euclidean grid we all learned about in geometry class (Z is 'up' in the Source engine). By building or designing what might be called an 'open z-axis' you are focusing on a fairly large space that has different player-accessible levels of height. Think of this as a large stadium, where the height is constantly varied along the edges, but it is very 'open.' Or, on a smaller note, imagine a tall room with many catwalks intersecting across it at different heights. This would be considered an 'open space' with different player-accessible levels represented as catwalks.
By designing spaces with this 'feature' you add alternative paths that would otherwise go undetected. Any time a user would like to change levels, they could simply jump down to the level below them. Also, by allowing players to get above other players, you add a new dimension to the game. No longer are players limited to searching for enemies left and right, but now, must look up to attack or be attacked. Also forcing the player to look up gives you, the level designer, a chance to show off more of your detailing skill by making whatever they're looking up at more interesting; it really does add a new element to the game, like revealing hidden spaces.
Chutes & Ladders
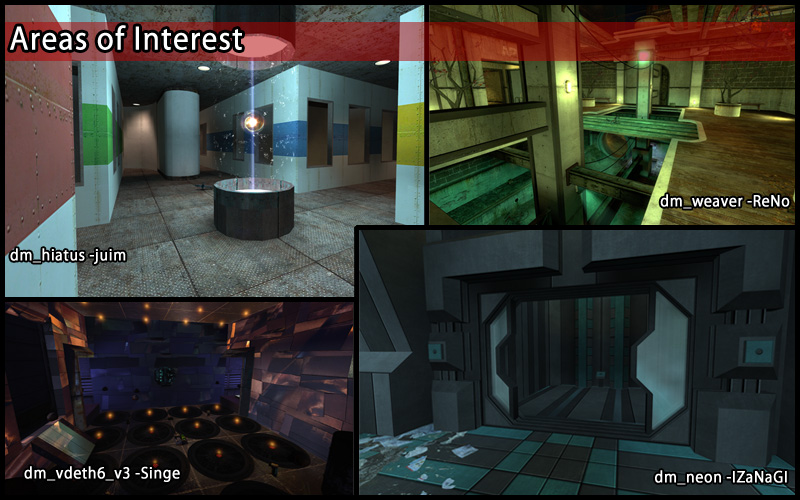
Sometimes in creatively designed levels (those that kind of make up their own theme, or a theme of that old-style Quake type gameplay) will employ some game specific mechanics you won't ever find in real life or any other medium (except science fiction I imagine) that help to make a level more fun. These mechanics are often-time devices that shoot the player across the map, or perhaps even teleport them. These can be things from elevators, to moving platforms, or even something as simple as waiting for some kind of gate to open that could smash you if you take too long getting through it. These little devices, I'll call them 'interest zones', can help create areas of your levels that are just that. When you begin to do this, you are fluctuating the popular zones within a map. These popular zones will affect where the kill/death ratio occurs in your map and will therefore create 'hot spots' of activity. Likewise, spawn points can have a great adverse affect on determining possible hot spots. Placing too many of them in a location would obviously cause instant kills and spawn camping. But placing them relatively close but with some air of protection, then players may be inclined to take their time seeking their next victim after respawning. For multiplayer levels, you always want to give the impression that you're giving the player a head start when they spawn. The spawn point should always be advantageous to the player, never degenerative and ill-placed. It's how they're first going to see your world, so give them something to look at as well!
So, as you can see, different themes can present different styles of design and offer different styles of gameplay simply by placing them differently relative to one another.
So, what did we learn here? Read on to the last page to catch my conclusion!
Conclusion
Am I Ready Now?
Of course you're ready; you were probably capable before you even read this silly tutorial. Reflecting now on a few of the points, you'll find level design to be a very open-ended field. And when you have available to you your own set of skills that become a hallmark of your levels, you'll begin to appreciate that of others. I'll admit, I'm not a fan of multiplayer mapping, that is, I don't do it a lot myself, but the lessons learned here can apply for any gameplay for just about any 3D fps game I imagine. Player clips are a big deal, and when using them to help smooth out your level, players will graciously thank you with their silent nod as they run through your level while by themselves on their own computer. Offering your services as a level designer to improving the
quality of gameplay while also supporting a unique and interesting atmosphere is what makes the job, and indeed hobby so much fun.
prop_physics_multiplayer Is a useful tool, but now you know it's not always required in multiplayer despite its name. Keeping a healthy attitude toward the performance of the server when you
first start to design your level, rather than in afterthought, you'll surprise yourself after it's all done and said with how much better it will 'feel' to you as a player. You'll probably ask yourself also: "Why did it take so long to make something so small?" and the answer just might be: "Because, you didn't just focus on that small area, but also everything that a good gameplay design entails." Indeed, there are plenty of other optimization techniques that lie within the purview of processing power and FPS (frames per second), but those probably won't have much affect on gameplay (unless the map can hardly be run at all). For those kinds of optimization techniques, I direct you to one of my favorite optimization tutorial pages:
HL2 Optimization Guide.
Beyond all that, I thank you for taking the time to read my first tutorial and may you employ your new skills to wit's end.
-
Riven