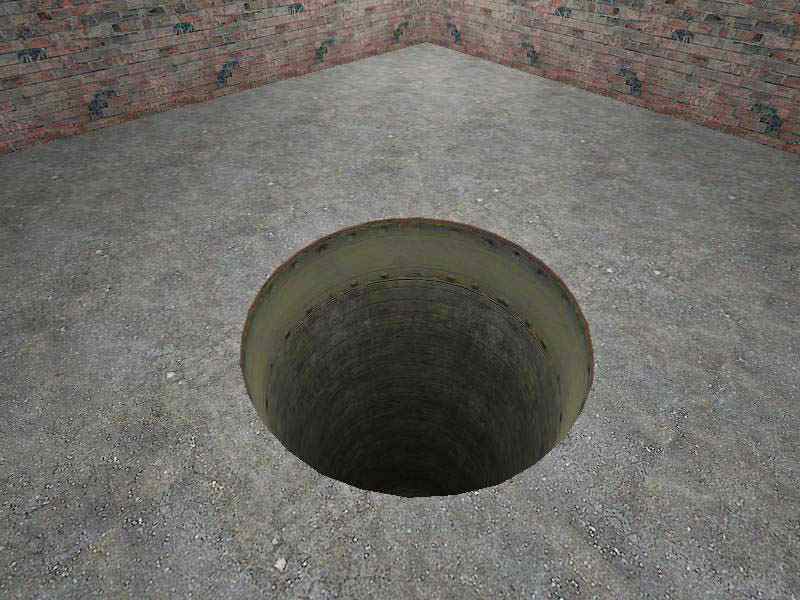
In this tutorial I will show you how to make a deep pit in your map. The basic principle can be used to make arched ceilings, tunnels, doorways, or any kind of arch structure that needs to fit into a square hole in your map; however this tutorial takes the step one step further.
Let's get started. First you need to create a brush that will be used as the floor and clip a square hole into the middle.
Creating the Arch
Now that you have the hole we need to place the arch that will make our cylindrical pit.
Make a new brush and fill the hole with it. Before you create the brush look the the prefab tool bar (default lower right). There should be two drop down menus,
primitive and
cube. Drop down the
cube menu and select
arch.
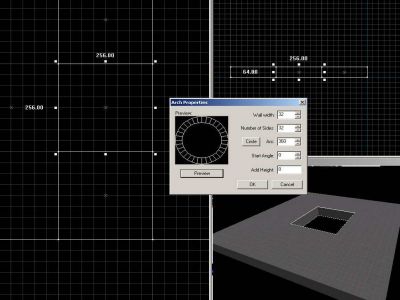
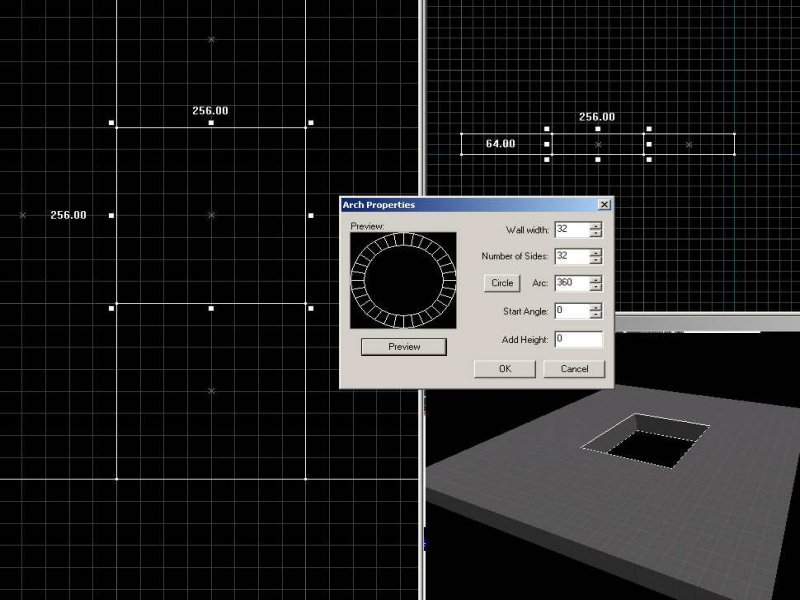
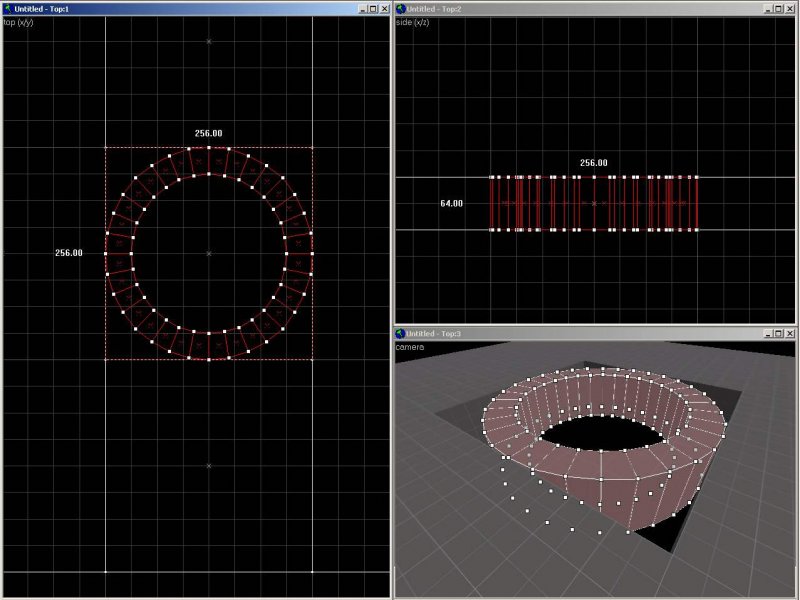
Now create your brush. The
Arch Properties box should pop up.
This is the gateway to curved structures
Here is a brief run down of the inputs:
Wall width - This is how thick the arch will be, the higher you set this number the smaller the hole will be in the center of the arch will be. It is a good idea to keep this number in the same range as the grid (2,4,8,16,32,64,128...). For this example set it to 32.
Number of Sides - This is the number of segments that will make up the whole arch. I always make this number an exponent of 2 (2,4,8,16,32). This makes the math very simple when you are trying to fit different sized arches together and they tend to look the best. Set this number to 32.
Arc - This value is the angle of the arch in degrees. We are making a circle so set this value to 360.
Start Angle - This value sets the starting angle of your arch in degrees. It is only important when making an arch that is less than 360 degrees.
Add Height - This is the way you would make a spiral stair case. Leave it at 0. Press the preview button and make sure it matches the screen shot. Once you are ready click Ok.
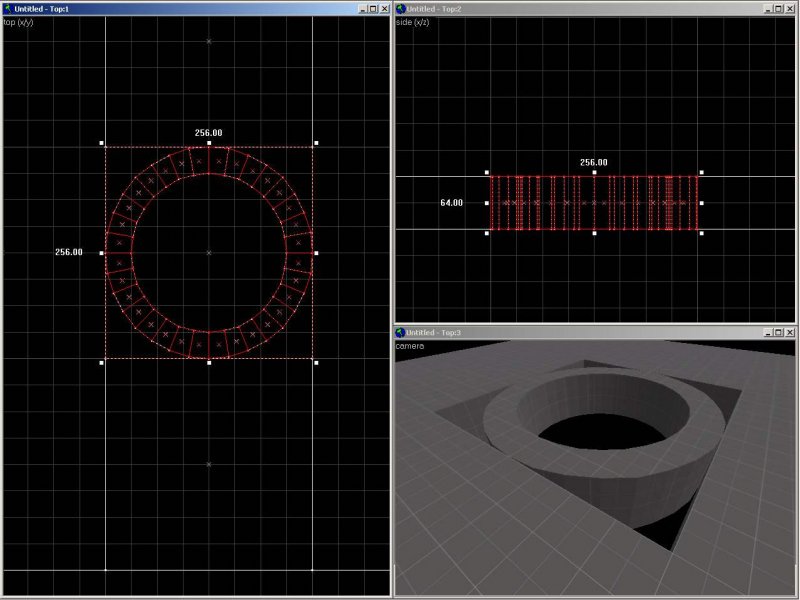
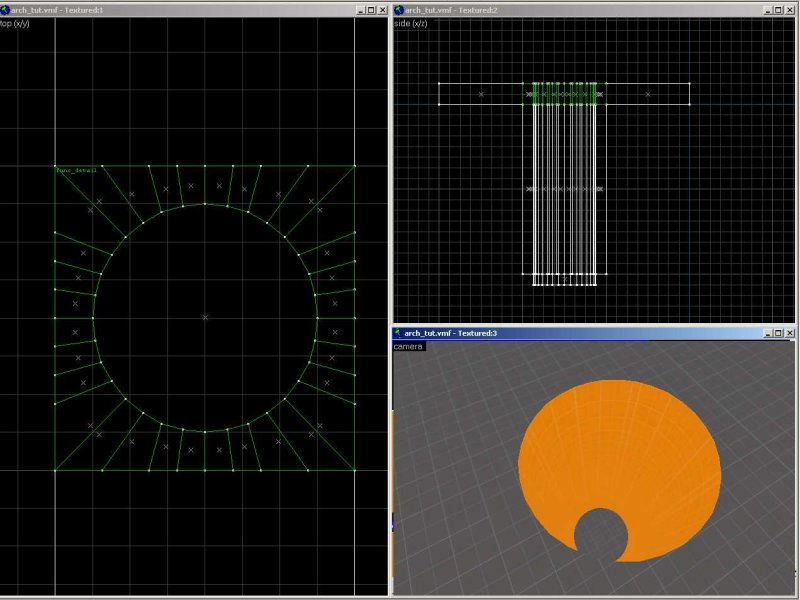
now you have a great looking hole, but how will you fill in those spaces?
Editing the arch
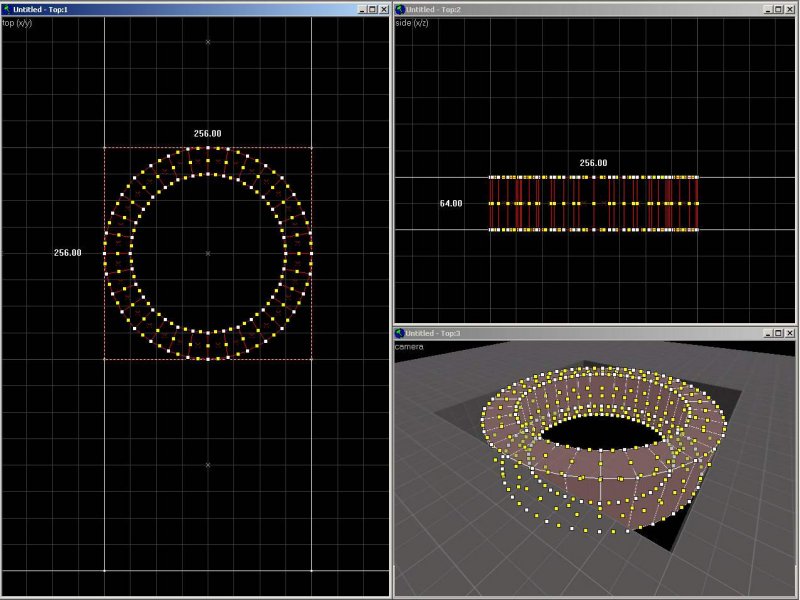
We have our arch but now we need to make it flush with the floor. We will use the Vertex manipulation tool for this.
Select your arch and then press the Vertex manipulation tool (shift+V).
Wow that looks complicated, lets get rid of those yellow dots for now. Press the Vertex manipulation tool (or shift+V) once more.
Now we will pull the outside vertices to the edge of our hole.
note: the line makes a perfect 45 degree angle, this is because we chose an arch that was an exponent of 2.
You may have to reduce the size of your grid to select and move the vertices into the right place.
Now finish off the rest of the arch.
Once you have the out side of your arch flush with the floor you can stretch the arch down, this will make our pit.
At the bottom of the pit create a 32 sided cylinder to cap off the bottom. Make sure the cylinder and the inside or the arch line up, if they don't then you have done something wrong. You can work around a mistake like this by placing a square brush to cap off the hole, but that will lead to a huge amount of face splitting.
Finishing touches
When ever you are working with an arch that is touching another brush like this you can run into some performance problems. So to prevent this problem we will use the clip tool and clip the top of our arch. Line up the clip with the bottom of the floor.
Be sure not to delete the top or bottom portion of the arch. Once you have successfully done that select the top part of the arch (you may have to turn on
ignore group) and turn it into a
func_detail.
NOTE: in some cases you're better off using a
displacement surface instead of an arch! Displacement works great when you want to create a natural element, like a rock arch or cave entrance. The arch tool is best for man-made elements in your map like doorways or pipes.