Titanic by Wild Card

Map Rating

  • 0
  • unrated

Map Download

Map Info

Map Description

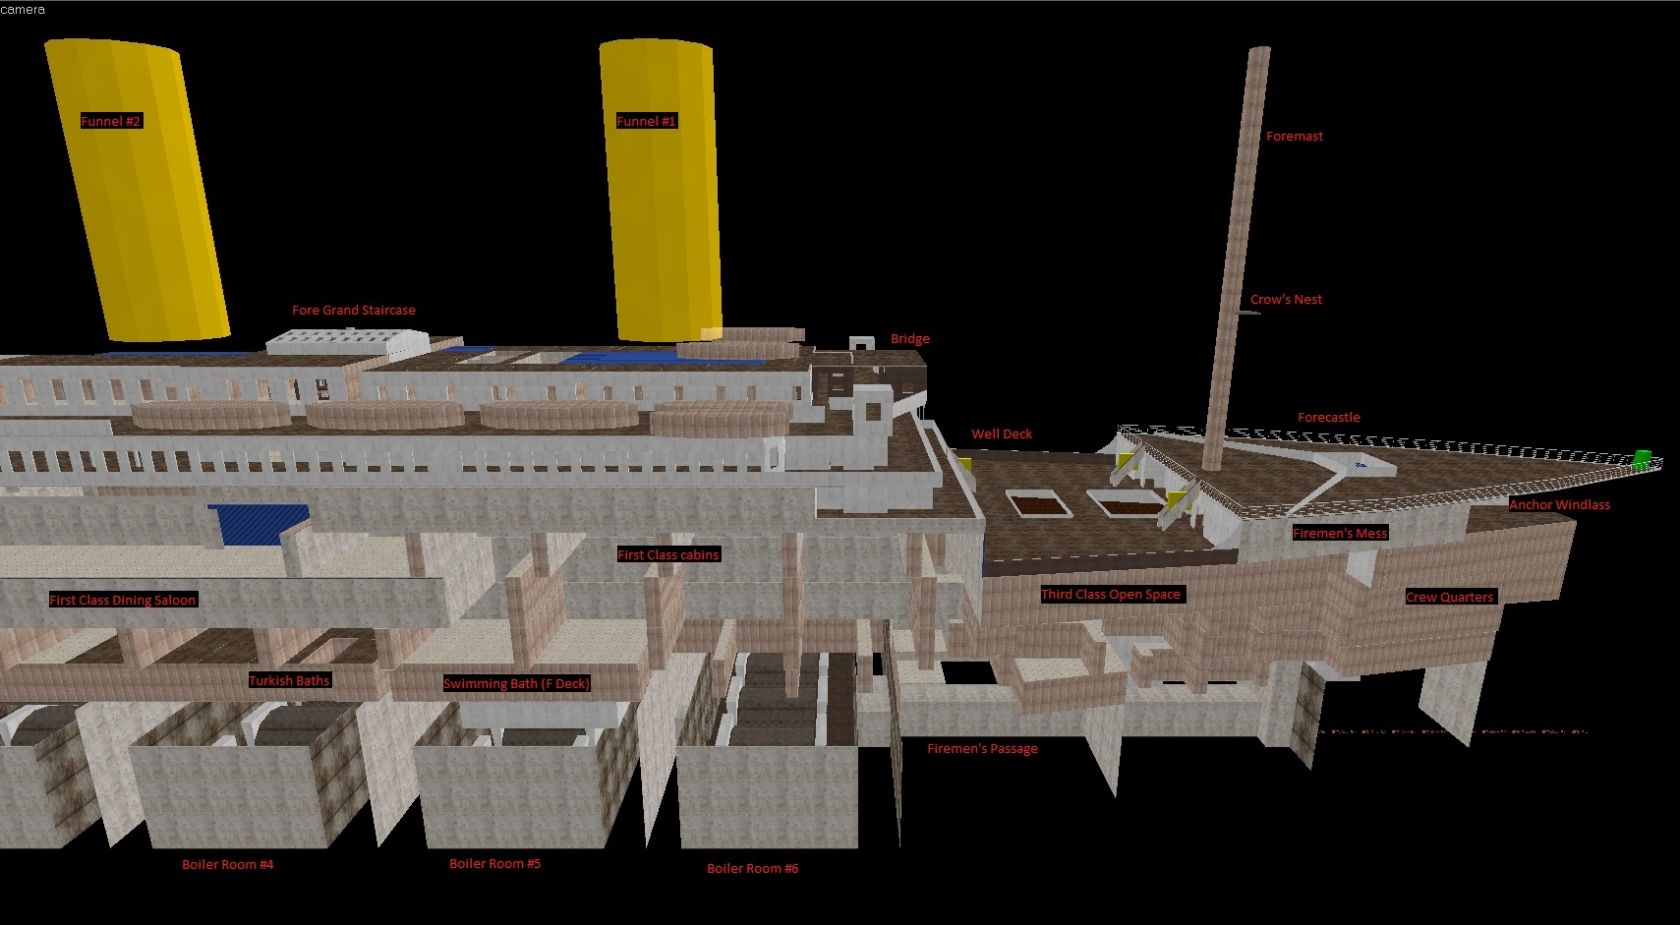
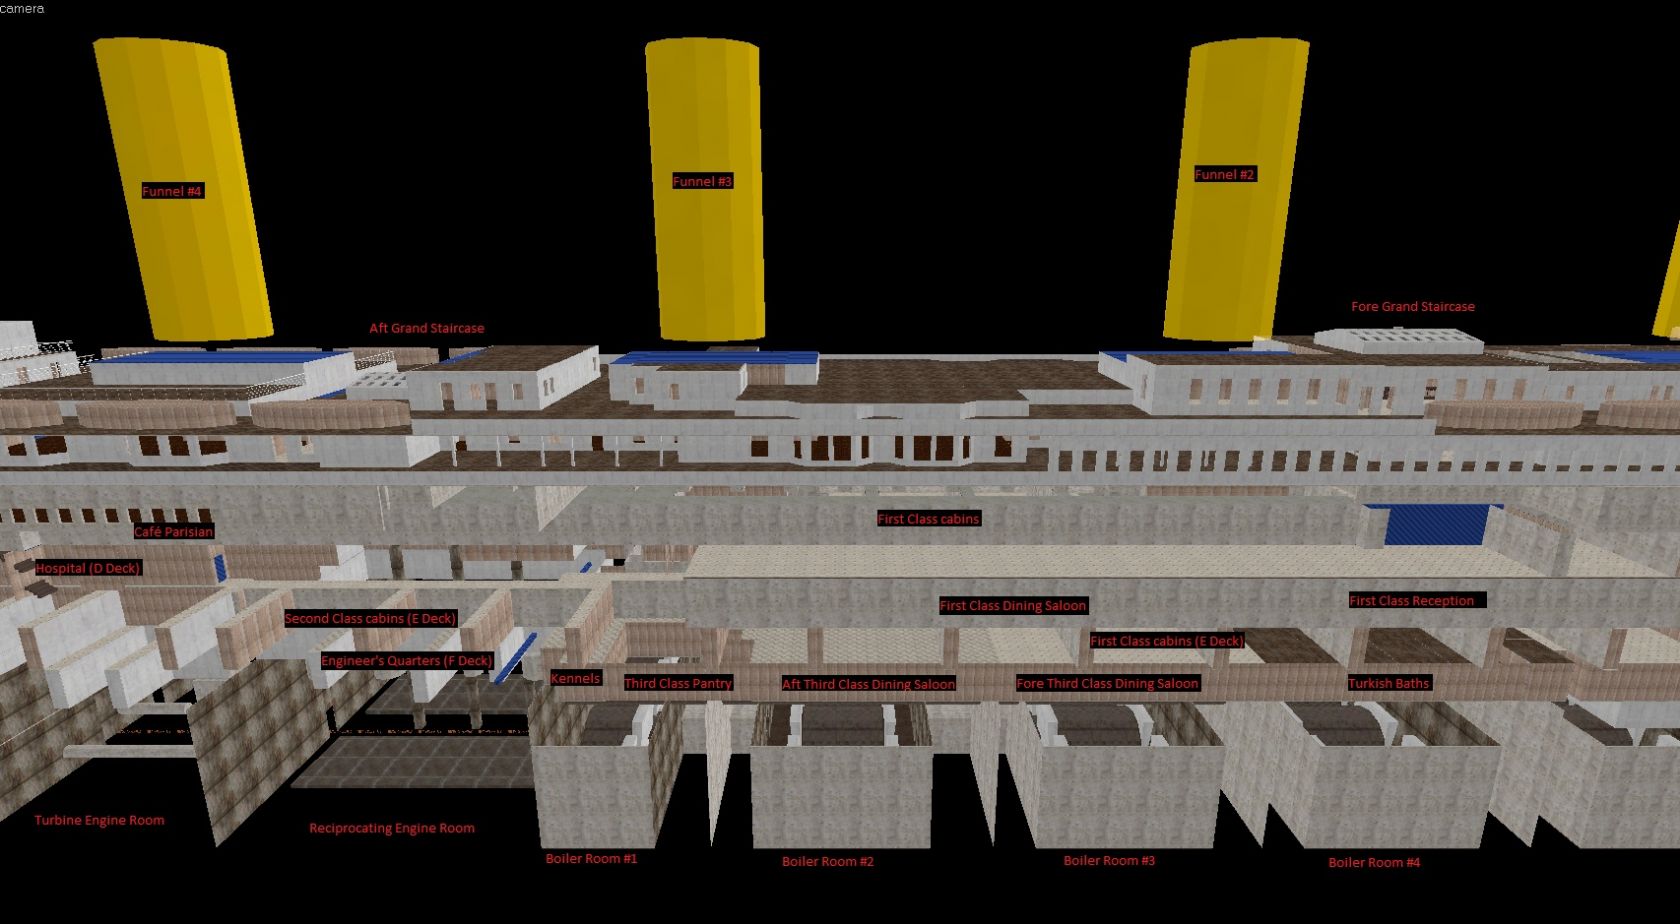
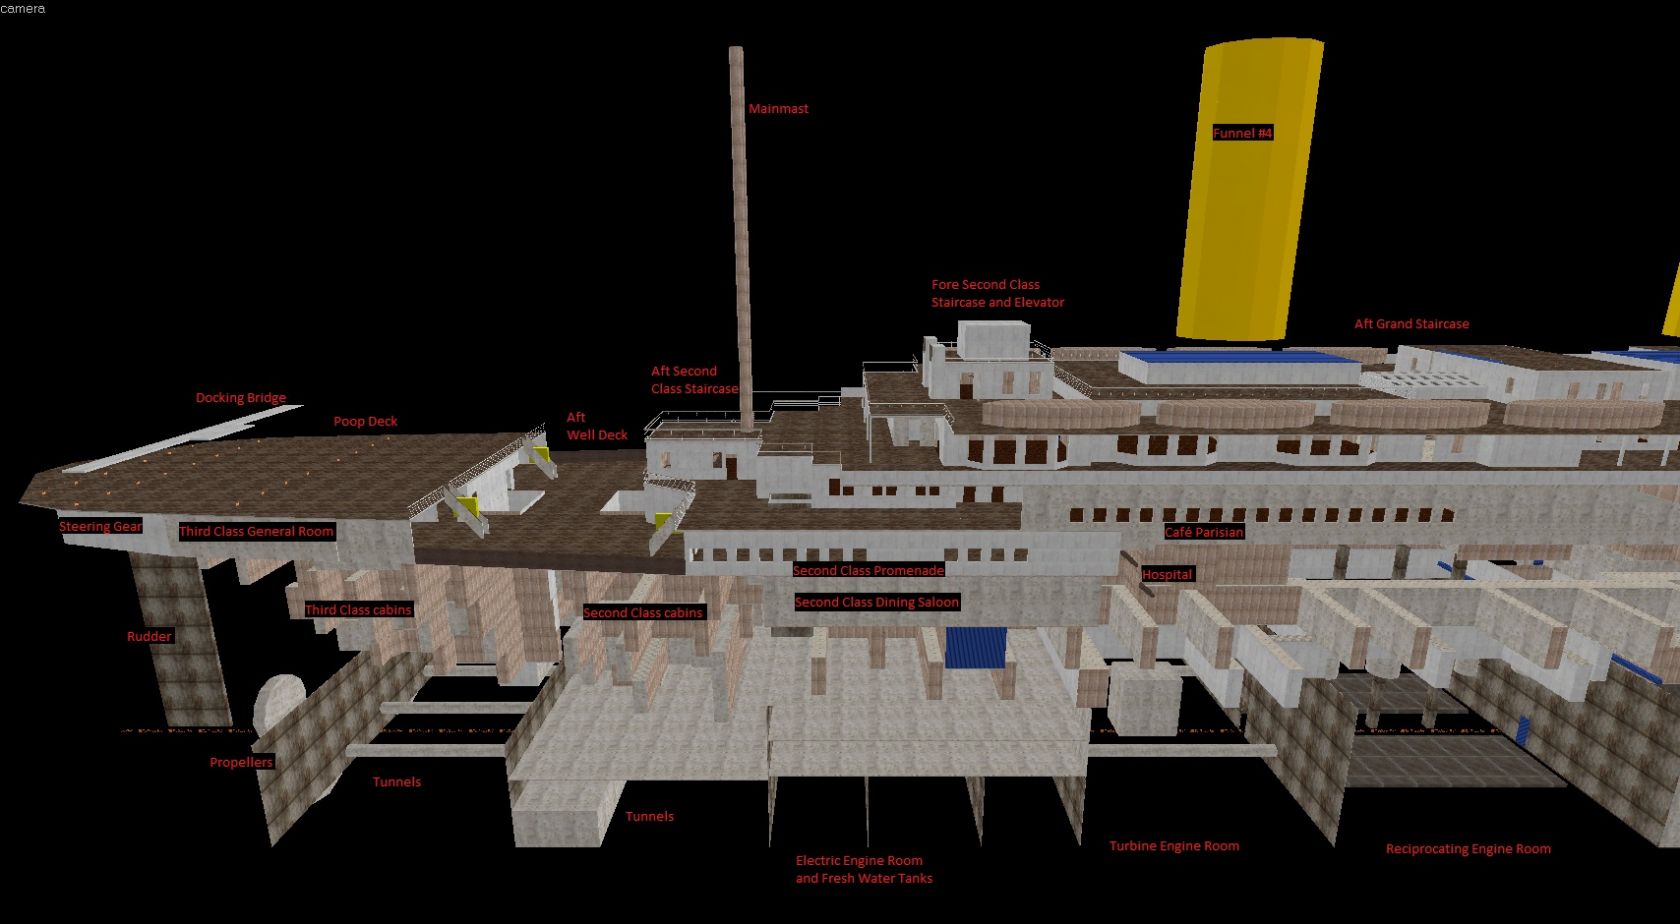
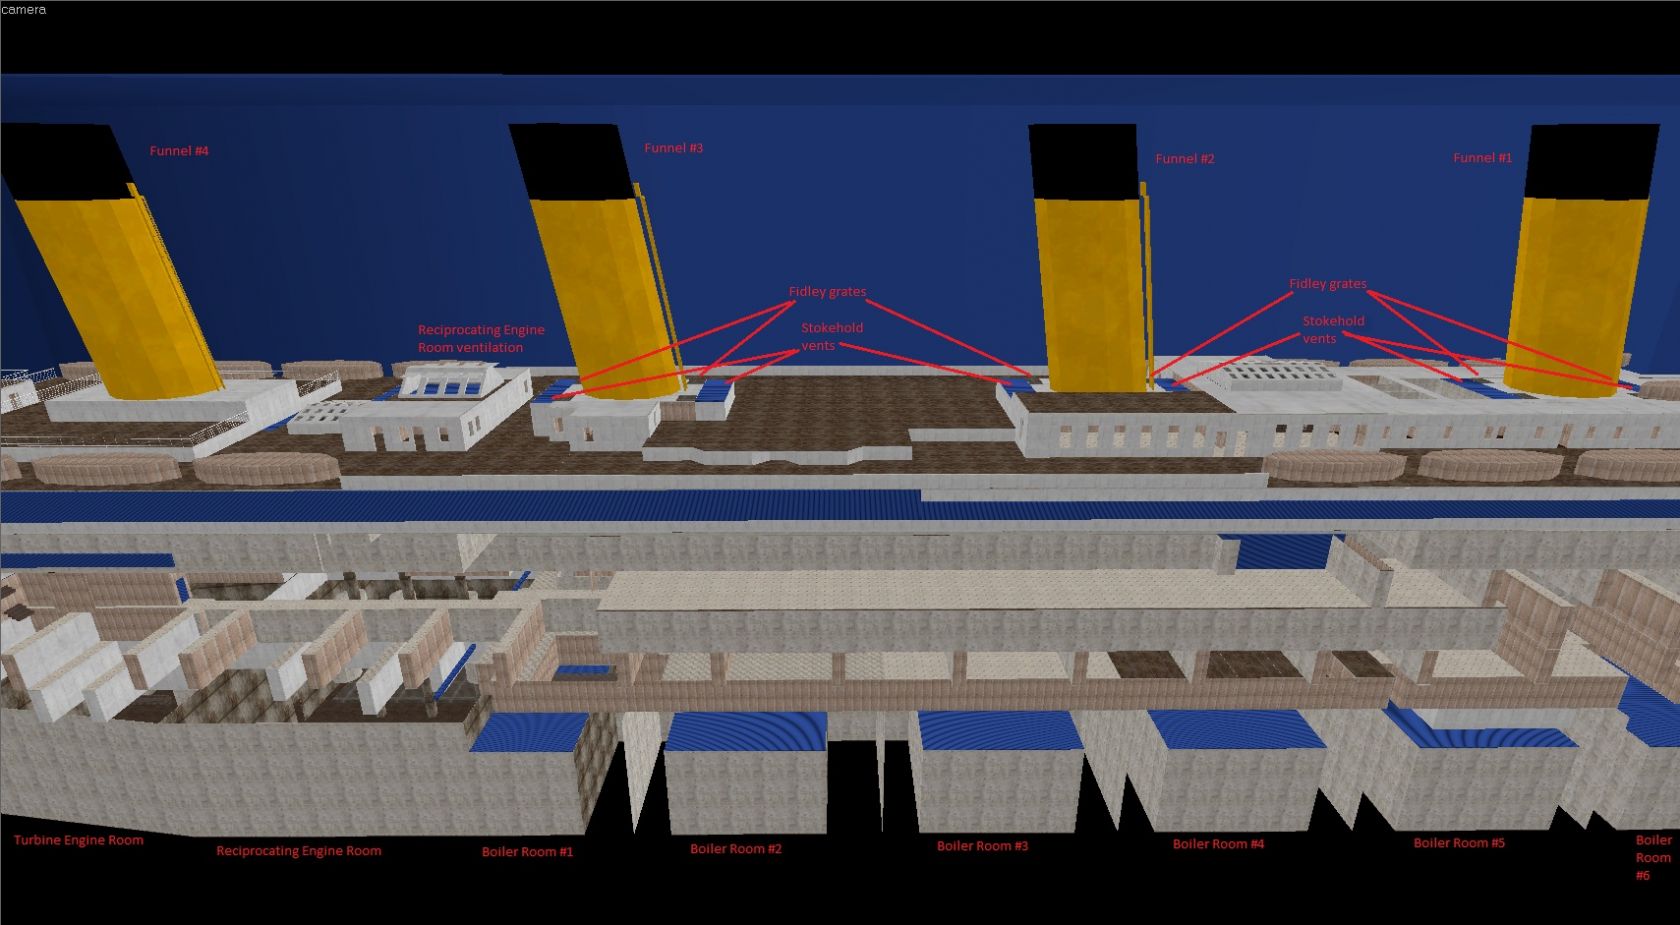
This is a complete recreation of the RMS Titanic.

This project will be broken into several phases:

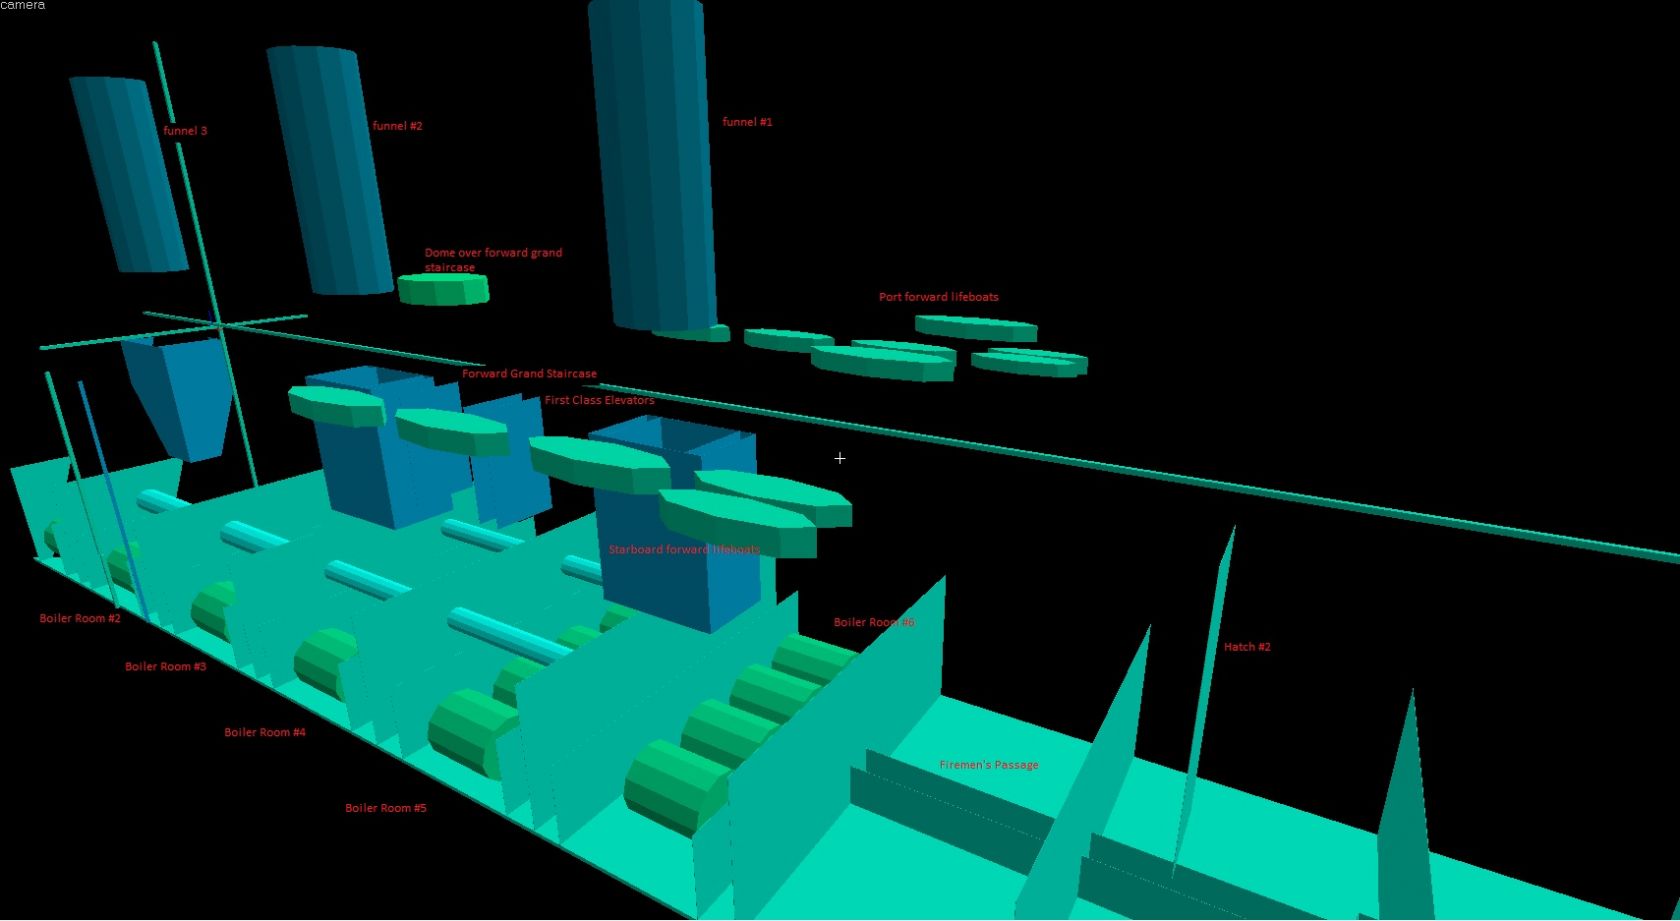
Phase 1 (December 23 2011 to March 24 2012)
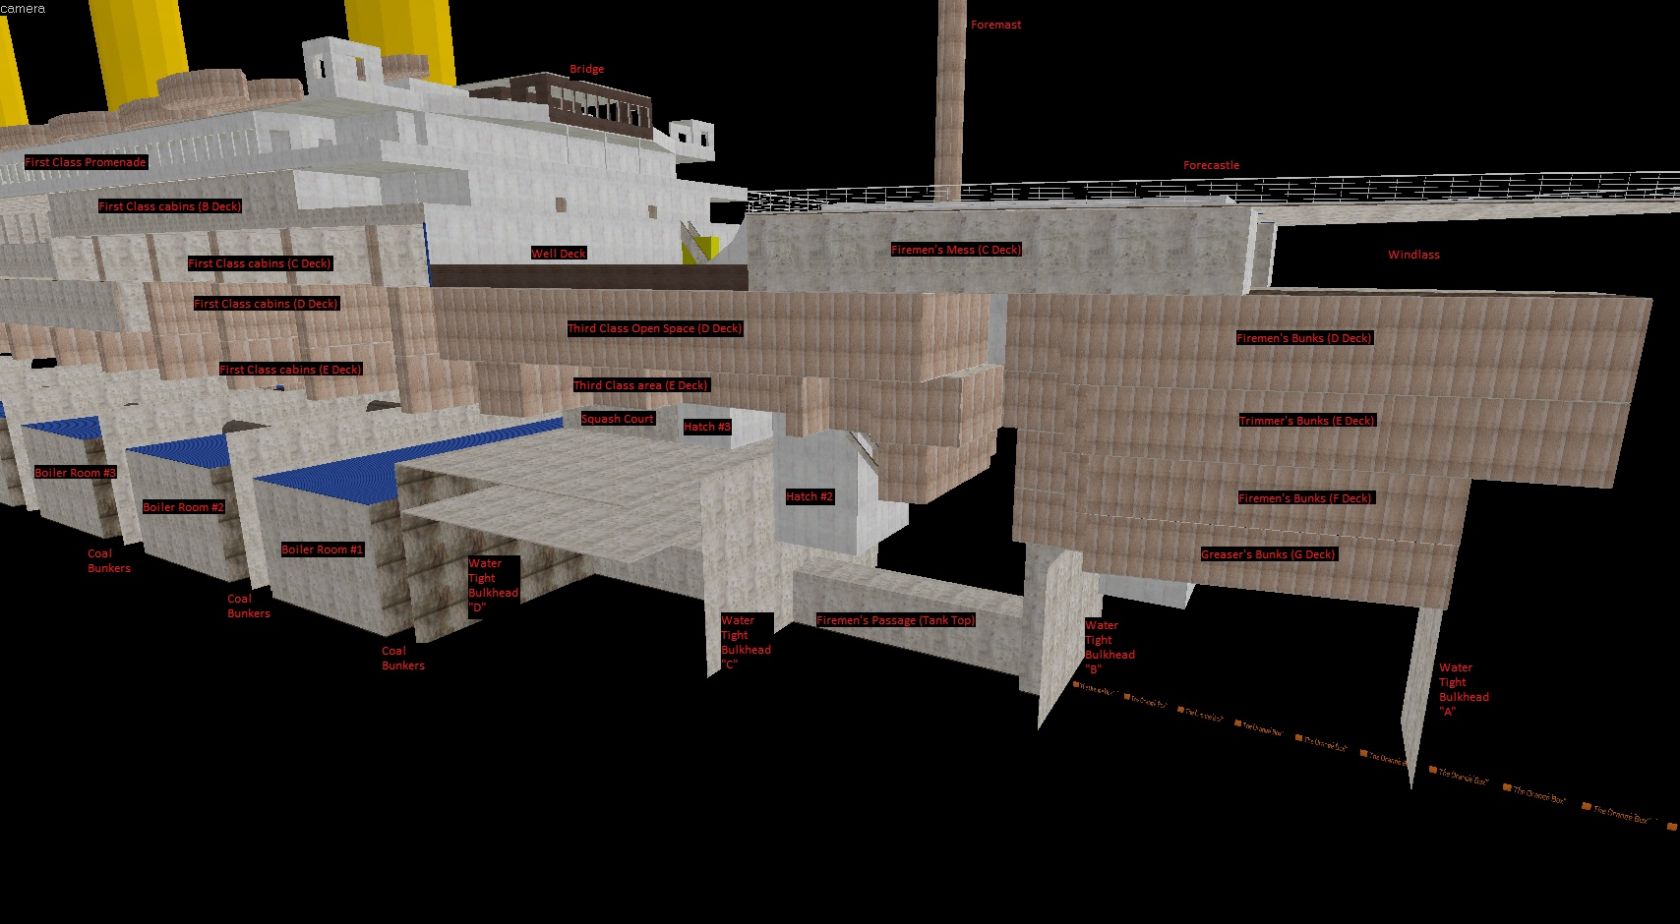
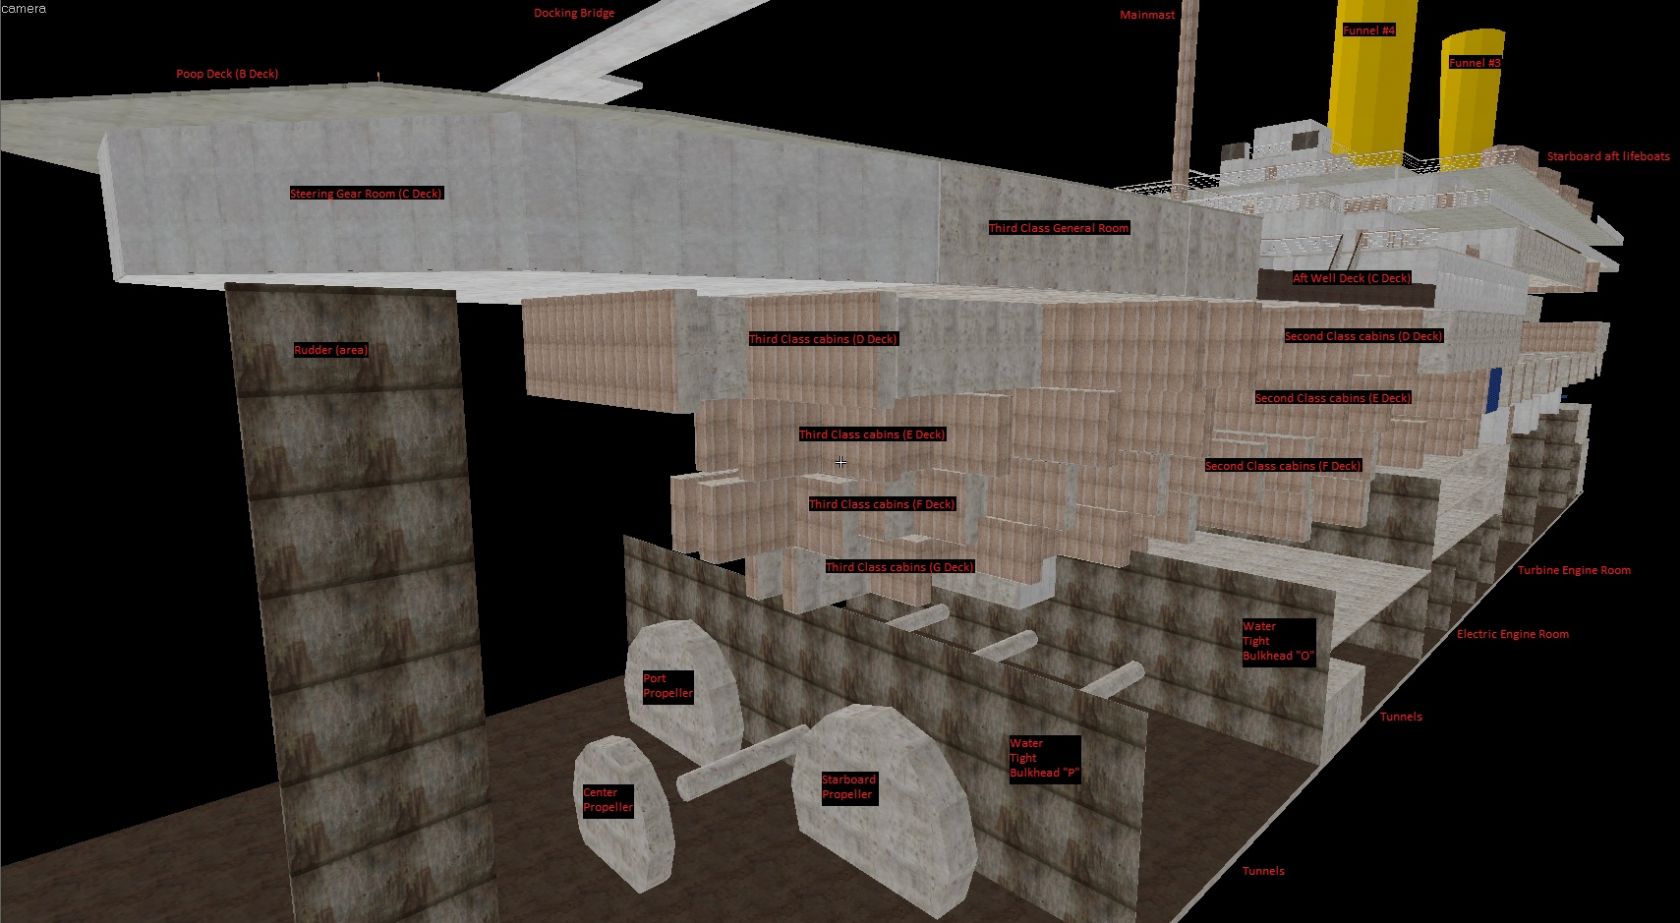
- Basic structure based on blueprints by Bruce Beveridge
- Texturing for clarity
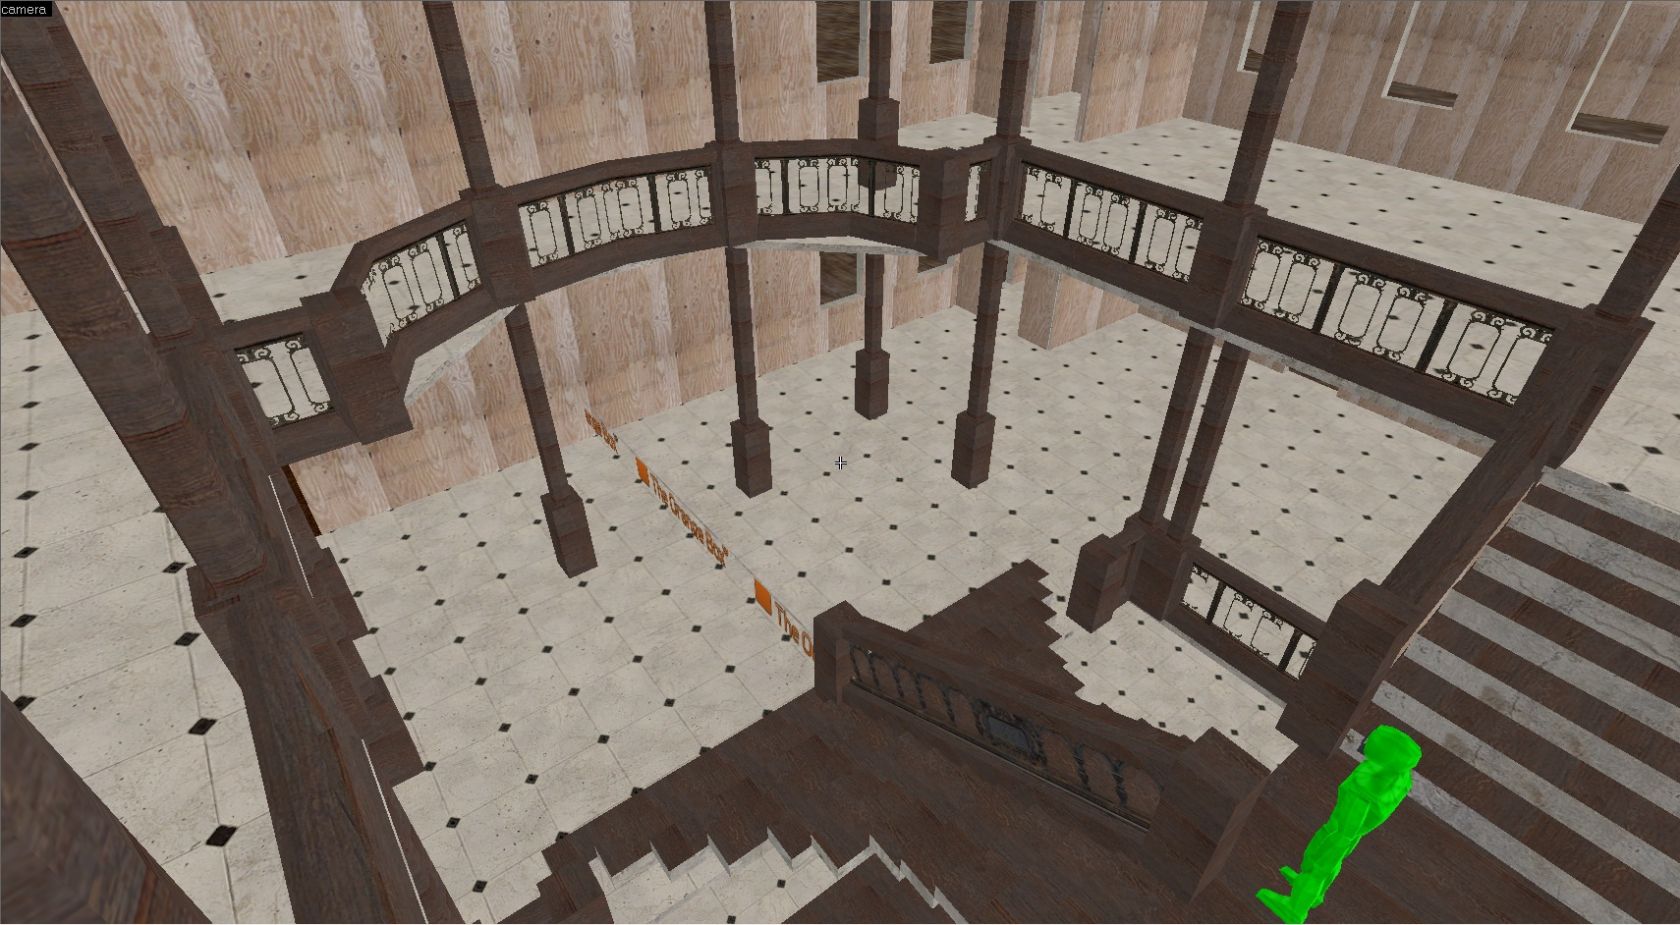
- Basic modelling of staircases
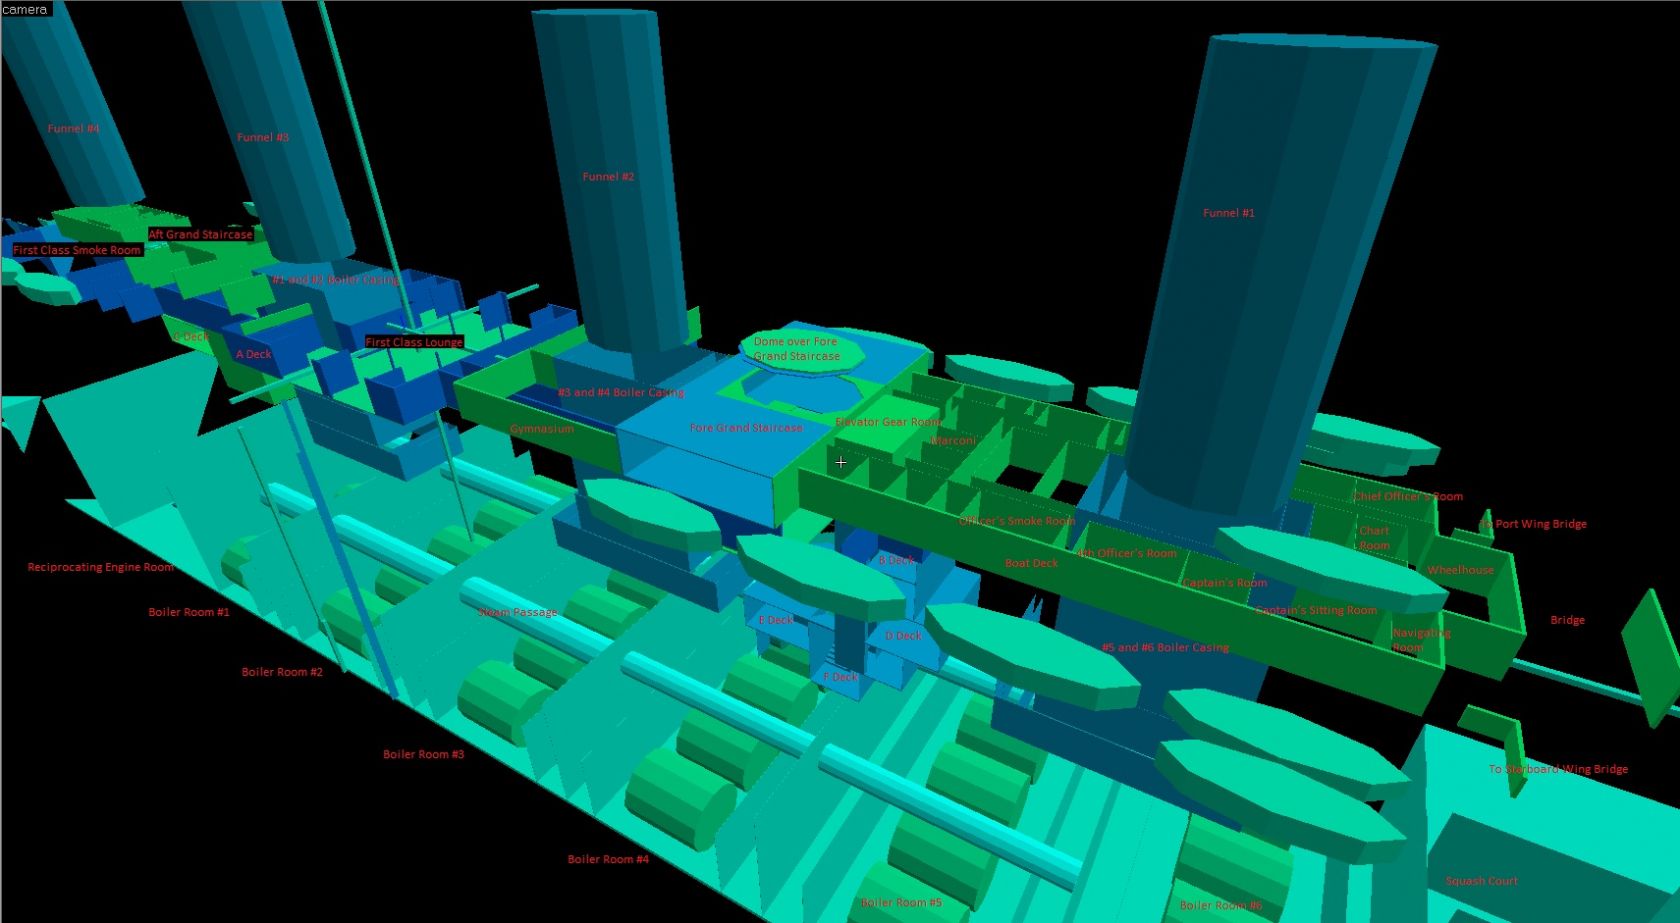
- Basic level optimization

Phase 2a (March 24 2012 to April 24 2012)
- Level splitting per deck with transitions
- Phase 2a abandoned in favour of optimization to the architecture

Phase 2b (April 24 2012 to present)
- Level optimization
- Architecture optimization
- Completion of re-texturing
- Details to Boat Deck including modelling external fittings

Phase 3 (unknown to unknown)
- Addition of rooms (cabins, lavs, storage, etc)
- Basic proper texturing
- Review of ship's structure
- Advanced level optimization (full VVIS compile?)

Phase 4 (unknown to unknown)
- Basic roofing/ceiling detail
- Doorways and doors
- Windows
- Funnel structure

Phase 5 (unknown to unknown)
- Modelling of rails
- Modelling of posts and supports
- Modelling of bridge and wheelhouse telegraphs and wheels
- Modelling of funnel accessories
- Modelling of lifeboats

Phase 6 (unknown to unknown)
- Basic lighting
- Skymap

The following details have been deliberately modified from the blue prints due to game limitations:

- Crew spiral staircases at the bow from D Deck to the Tank top due to player collision hull. The staircase has been made bigger.

The following links are for Youtube videos of the progress:

Video 4:
http://www.youtube.com/watch?v=yXf0MZwGQds

Video 3:
http://www.youtube.com/watch?v=T4Z9mdRj3Yo&context=C4091e83ADvjVQa1PpcFN85OhX63C1Ifzxjqyfg7ZqBrHgULYCdEs=

Video 2:
http://www.youtube.com/watch?v=jHMj6Py6JkU&context=C4bb6491ADvjVQa1PpcFN85OhX63C1IXdOvzRH_9nulYU5mkYJ9Lo=

Video 1:
http://www.youtube.com/watch?v=maAJhYHY83g&context=C44160a7ADvjVQa1PpcFN85OhX63C1IaBPRceeZ6NaP7ksfc8Xn2I=

Discussion

Posted by Wild Card on Sat Jan 14th 2012 at 6:36am
[Author]

All of the window locations on the Boat Deck are now complete, along with those of the aft Second Class Staircase. I've also added the stairs linking the aft Well Deck with the Poop Deck and the middle B Deck. A rough shape of the stern has also been done, this one harder to judge because the blueprints dont measure that far back.

The most notable addition this time around, as seen in the picture below is the addition of the skylight assemblies over the fore and aft Grand Staircases. The aft one is based on the prints, the forward one is based on best guess from what I could find on pictures, but because this one is technically above the Boat Deck, it doesnt show up on the prints.
User posted image
Posted by Wild Card on Fri Jan 13th 2012 at 11:17pm
[Author]

:P haha. Actually though, Im not sure how much of the external hull I want to build accurately. The main importance is getting the "guts" built, and then the lower hull sides will come later. Certaily at the bow and the stern, where the hull isnt straight but curved, I'll do as best I can.
Posted by Orpheus on Fri Jan 13th 2012 at 9:55pm

The hull plating on the real Titanic was so poor that anything WC coats his with will be an improvement. :lol:
Posted by haymaker on Fri Jan 13th 2012 at 8:09pm

Yup looking more and more shipshape :P

Might I suggest you start considering your hull skin, as I remember mine to be a quite a pain to hammer into shape, and having to adjust some things to make it work.

I would consider the hull an ideal candidate for converting to a collection of models, were I to attempt it again.
Posted by Wild Card on Fri Jan 13th 2012 at 4:18am
[Author]

Quick update again. All of the window locations are put in on the Boat Deck level forward of the Fore Grand Staircase, including the staircase and the gymnasium. As well are staircases between the Boat Deck and A Deck, A Deck and B Deck, as well as those from B Deck to the Well Deck, and from the Forecastle to the Well Deck.

Still just very basic brush work but thats all Im aiming for right now. Now the front of the ship really looks like the front of the ship.
User posted image
Now at 3003 brushes, added nearly 300 worth of stairs and windows heh.
Posted by Orpheus on Fri Jan 13th 2012 at 1:06am

XXXOOOXXX back atchas.
Posted by Wild Card on Fri Jan 13th 2012 at 12:21am
[Author]

Just for you Orph!
User posted image
Riven, I've given thought to what you said again, about sprucing up a room or an area of the ship as a proof of concept. And Im going to work a bit on that. But rather than make something in the maximum level of detail I want to achieve, Im going to focus on going over the sections of the ship I already have and adding detail to it.

When I first started, the main thing was getting walls in place at distances and lengths where they were supposed to. I then started adding doorways.

Now Im going back, starting on the forward Boat Deck area to add windows as well as the missing stairs between Boat Deck, A Deck, and B Deck on the forward end. Another thing I havent been doing thus far (except for the Boat Deck) is ceilings. For each of A, B, and C Deck, the only "ceilings" have been the floors of the decks above. They are 4 units high, but now I'll split them; 2 units for the floors, 2 units for the ceilings.
Posted by Orpheus on Thu Jan 12th 2012 at 2:06pm

I see the place where the king of the world stood. :lol:
Posted by Wild Card on Thu Jan 12th 2012 at 3:38am
[Author]

Spent some time today fixing up measurements of the water tight bulkheads (WTB) on the tank top. Most were 1 or 2 units off, since I hadnt fixed them up since re-doing the grid a while back. So that was about two hours of work that didnt really produce anything to show lol.

I also added the water tight doorways (not the doors yet) for all the water tight bulkheads at the tank top level as well, from the Firemen's Passage on the forward end to the tunnels of the propeller shafts on the aft end.

Finally, I started shaping the bow of the ship by measuring WTBs "A", "B", and "C". Then the next step was to measure the same longitudinal points but at the B Deck level where the Forecastle is. You can see the results below.
User posted image
I'll probably get working on shaping the stern soon. The previous plan was to get started on D Deck, and I will eventually, but I cant really start D Deck at either end of the ship (bow or stern) as the documented height of D Deck is 10 feet 6 inches at it's heighest level at the center of the ship, but only 9 feet at the bow and stern. So the question becomes, how do these measure up.

Things are coming along though!

Brush count is now at 2756.
Posted by Wild Card on Wed Jan 11th 2012 at 2:30am
[Author]

Some more pictures of the progress.

I've completed most of the basic layout of C Deck. Like I did with B Deck, none of the actual passenger cabins have been done yet. I may do them all, or only a few, Im not sure yet. There are many different styles and layouts for each room so later I may add them all.

I'll be starting on D Deck soon and hopefully at the same time I'll be able to start shaping the bow and stern of the ship to a more proper shape (ie: pointed at the bow and rounded at the stern)

When I get back home in a week and a half I'll also work on getting some custom textures setup from the links above and create some sort of pack I can use. I tried signing up for CG Textures but my confirmation email still hasnt arrived 48 hours after registering lol! (and no, its not in my spam :) )

So, without further ado, here are today's progress shots: (in imageshack for now because I dont have my regular access here)

Area around the forecastle and forward well deck area. Behind the crew hospital is the entrance to the crow's nest (internal ladder in the foremast) as well as other crew rooms, and to the sides, the mess rooms for season (port side) and firemen (starboard side):
User posted image
This shot shows the overall progress of the decks from a forward angle:
User posted image
This shot shows the overall progress of the decks from a rear angle. The labels above the cyclinders in the Reciprocating Engine Room denote the type of cylinder from the tripple expansion steam engines used to power Titanic's outer propellers: HP is for High Pressure, MP is for Medium Pressure, and LP is for Low Pressure. Steam from the boilers entered the engines to the HP cylinder, then went to the MP cylinder, then went to the (I think) forward LP cylinder, then the rear LP cylinder, and finally to the low pressure turbine in the Turbine Engine Room, and finally to condensers on either side of the turbine, before returning to the boilers.
User posted image